Countdown calendar

You finally have a date on a calendar? You FINALLY have your plane ticket? You are excited and want to see every days and hours that separate you from your SO go away? But, how to make the wait feel less heavy? I answer to that : A homemade countdown calendar! It always feel good at the end of the day to scratch a huge X on the calendar. It is a quick and easy way to keep track of how many days you have left, and it feel amazing to see the amount of day decrease. If you are just like, me you like to have multiple calendar everywhere you go (I have one at my office, one in my apartment and on my cellphone), you will like this little craft idea.

Many ways of creating a countdown calendar exists… some ideas here :

  • Candy in a jar for each day left – you eat one a day!
  • Countdown cellphone app – Try Days left app for androids!Screenshot_20160515-172311.png
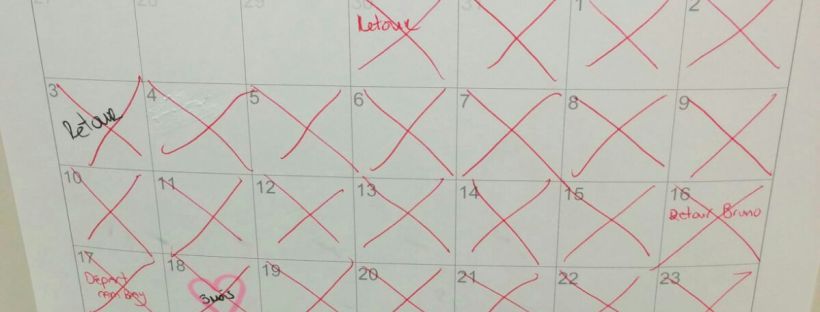
  • Normal calendar – Putting an X at the end of each day!
  • 2 jars : One for the days left, and one for the passed days. Fill the first with tiny jewels/objects of your choice, and you only need to transfer 1 jewel in the another jar per day!
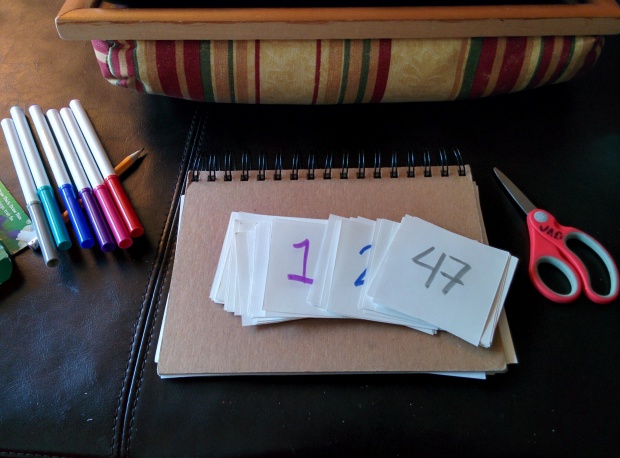
  • Crafting your own countdown! Here’s mine :

Take drawing paper (thicker) and cut it in even square of the size you prefer. Cut the number you need. Reshape those piece of paper as you wish! Heart shape, airplane, geometric ones, multiple shapes, etc…

Get your favorite color pencils, and depending on the amount of time left, choose a color for each 10 days. What I decided exactly is to begin with, black, then grey, and then cold colors (blue, purple) to hot colors (pink, red). The more I get closer to see my SO, the shades turns into a hot one.

IMG_20160515_160217

Now that you wrote all the number of days left on each piece of paper you need to turn on your creativity portion of your brain! Quotes? Drawings? Plain? Coloring? Things you like about him/her? Photos/scrapbooking? You decide! I choose to write quotes, weeks left, couple anniversaries dates, anything to help me cheer up.

Now we want to put them all together! You can create holes at the top of each piece of paper and tied them up with a lace, or you can create a giant countdown wall in your room with stickers.

You finally have your countdown calendar! You can do what you want with each day that pass by : put it to trash, put an X on it, or simply flip it at the end if you laced them all together!

Hope you liked this little craft idea 🙂 don’t forget to comment and send me photos of your own countdown calendar. Thanks for reading!

Julie-Anne

Handmade Couple Tees?

Hello there!! Want to do something creative, cute and useful for you and your lover? Why not creating your OWN couple T-shirts? Oh yeah you read well… we’re going to paint on shirts! I’ll share with you my secrets about fabric painting on this post, let’s begin.

The example I’ll show you today is actually one of the birthday gift I sent to Bruno recently. I took a drawing from one of our couple drawing session to embellish a simple shirt and make it more personal.

Material :

  • Plain shirt
  • Fabric paint (PEBEO)
  • Brushes
  • Scalpel
  • Printer/paper
  • A drawing that you want to reproduce
  • Tape
  • Iron/ironing board
  • Creativity and patience

**(I recommend to read through the whole text before trying out to make sure you have everything!)

1- Fist you need to find a plain shirt of any color. My advice would be to use black, it is easier to correct and modify if it is your first try. (H&M, Forever 21, and other boutique have plain and cheap shirts in stock year round!)

2-Find PEBEO fabric paint, preferably opaque one (or any other fabric paint you can find in any art shop). Again my advice here would be to try black and white first.

IMG_20160328_194524

3- Paint brush! Of course since we’re going to paint. Any type is OK, as long as you feel comfortable with the size and shape of the brushes you’re going to use.

4- Find a simple drawing that inspire you (sketches are the best), it could be anything, here’s mine:

IMG_20160313_192541~2

I decided to take my own drawing so the shirt would be personalized.

5- Print the drawing the size you want it to be on a shirt, and find the location you would prefer.

6- Cut with a scalpel the majors parts of your drawing so you can have a good idea where to paint your lines.

6- Put a hard board inside the shirt to the location of the drawing, like that it’s going to be easier to paint and you’ll have less chances that the paint go through all the layers of fabric. Another tip would be to tighten the shirt with clips so the fabrics will not move during the creative process.

7- Tape the drawing so it can’t move. Paint over the holes you cut with the scalpel with the color of your choice. Wait for the first layer to dry completely (which normally doesn’t take too much time).

8- After it’s completely dry, remove the tape and the paper to complete the painting. Now we will play at : join the lines. With the same color complete the blank space so it could resemble the drawing.

IMG_20160328_200009


9- With the black paint, you can adjust the color that overfill. Wait each layer to be completely dry before applying a second one or another color. Now, add some fantasy if you want!


10- Flip the shirt over when everything is over and dry. Iron the fabric where you painted for around 5 minutes. Now your shirt can be worn out and put to the washing machine without any problem!


Want an other example: here’s how our couple shirts looks like (thematic Panda) based on the same methods:

IMG-20160214-WA0000

There you go! Hope you liked it, and will make good use of this tutorial. Please, send me pictures if you tried it, I would love to see others works of art.

PS. Even though this post is about couple shirts, you can use this to embellish any of your shirt! Go and be creative now. 🙂

Julie-Anne